
After purchasing and testing both of Benro's Panorama clamp models PC-0 and PC-1, I realized that Benro's design and quality have improved vastly in the last couple of years or so.
Benro PC-0 Panorama Clamp
| Manufacturer Specification: | |
|---|---|
| Model: | PC-0 |
| Total width w/ screw knob: | 101 mm / 3.97" |
| Diameter: | 60 mm / 2.36" |
| Height: | 25 mm / 1" |
| Height w/ base plate attached: | 37,5 mm / 1,5" |
| Bottom mounting thread: | 3/8"-16 and 1/4"-20 via bushing |
| Weight: | 270 gr / 0.6 lbs |
| Max Load capacity: | > 5.0 kg / 11 lbs |
| Panning Scale: | 0 - 360 degrees |
| Angle Marking Scale: | Every 2.5 degrees |
 |
| Benro PC-0 comes boxed with a pair of Allen hex keys, a long M6 bolt for attaching the head/clamp directly on a ball head with M6 thread and a dovetail base plate which attaches with two flat M6 screws. (The thread converter 1/4"-20 to 3/8"-16 pictured above is not included in the package.) |
 |
| Top view of the Benro PC-0 Panorama clamp. Due to the round shape the clamp jaws have an effective length of 4,63 cm (1.82"). We can see clearly the center stem made of stainless steel and a hole with a recese for the M6 hex bolt screw that comes in the box for attaching the clamp directly on top of a ball head. There are two deep safety stop relief grooves for the M3 safety stop screws that exist under many rails or camera plates which prevent them from a free fall in case the clamp is not fully closed. In one of the relief grooves exists a clear spirit (bubble) level very helpful for horizontal leveling of the head. The small knob (in the left side of the picture) controls the friction /locking of the panorama base, while the larger and 4,32cm (1.7") long knob (in the right side) opens or closes the clamp with 1 and 1/2 revolutions and can also be used as a turning lever. The large knob has the new Benro design rubber ring that we see on most Benro head knobs. |
 |
| Top-side view of PC-0 Panorama clamp shows clearly all engraved markings. On the clamp jaws exist five markings per side at 1/4" (0,63cm) intervals totaling a scale of 1" (2,54cm), intended to help in the alignment of rails or camera plates. However, due to the fact that most rails and plates have decimal marks in mm and cm this is not very helpful except for the center marks. On the clamp side exist 3 markings at 90 degree intervals. The center markings both on top and sides have a longer Φ mark, the ones on top indicate the center of the clamp while the ones on the sides indicate the center between the jaws. The base is marked with a degree scale from 0 to 360 degrees in 2.5 degree increments with digits every 15 degrees. |
 |
| Base View with dovetail plate detached. In the base center there is the 3/8"-16 threaded hole for mounting the panorama head directly on a tripod, while on the side exist anti twist grooves for mounting the clamp directly on a ball head. |
Benro PC-1 Panorama Clamp
| Manufacturer Specification: | |
|---|---|
| Model: | PC-1 |
| Total width w/ screw knob: | 111 mm / 4.37" |
| Diameter: | 70 mm / 2.75" |
| Height: | 25 mm / 1" |
| Height w/ base plate attached: | 37,5 mm / 1,5" |
| Bottom mounting thread: | 3/8"-16 and 1/4"-20 via bushing |
| Weight: | 350 gr / 0.77 lbs |
| Max Load capacity: | > 8.0 kg / 17.6 lbs |
| Panning Scale: | 0 - 360 degrees |
| Angle Marking Scale: | Every 2.5 degrees |
 |
| Benro PC-1 comes boxed with a pair of Allen hex keys, a long M6 bolt screw for attaching the head/clamp directly on a ball head with M6 thread and a dovetail base plate which attaches with two flat M6 screws. |
 |
| The PC-1 Panorama clamp is almost identical to the PC-0 except for size, a small difference in engraved marking on the clamp jaws and the location of the spirit (bubble) level. Due to the round shape the clamp jaws have an effective length of 6 cm (2.32"). The same center stem made of stainless steel and the hole with a recese for the M6 hex bolt screw that comes in the box for attaching the clamp directly on top of a ball head, exist here too. There are two deep safety stop relief grooves for the M3 safety stop screws that are found under many rails or camera plates which prevent them from a free fall in case the clamp is not closed. The clear spirit (bubble) level that is very helpful for horizontal leveling of the head, exist also on PC-1 but as the clamp is larger, the bubble level is relocated on top of the external clamp jaw, making it visible even when a rail is clamped. |
 |
| Top-side view of PC-1 Panorama clamp shows clearly all engraved markings. On the clamp jaws here exist nine markings per side at 0,5cm (~0,2") intervals, helping the alignment of rails or camera plates totaling a scale of 4cm (~1.57") in legth. On the clamp side exist the same 3 markings at 90 degree intervals. The center markings both on top and sides have a longer Φ mark, the ones on top indicate the center of the clamp while the ones on the sides indicate the center between the jaws. The base is marked again with a degree scale from 0 to 360 degrees in 2.5 degree increments with numbers every 15 degrees. |
 |
| Base View with the dovetail plate attached. Through the opening in the dovetail plate we can see the base center where is the 3/8"-16 threaded hole for mounting the panorama head directly on a tripod, and on its sides the anti twist grooves for mounting the clamp directly on a ball head. The small knob (on the center-left of the picture) controls the friction or locking of the panorama base, while the same as in PC-0 larger and longer knob opens or closes the clamp with 1 and 1/2 revolutions and can also be used as a turning lever. The large knob has the new Benro design rubber ring that we see on most Benro head knobs. |
Mounting the Panorama Clamps...
 |
| Attached on the Benro B-2 Ball Head via the base dovetail plate. |
") |
| Clamp on a clamp but very versatile. |
 |
| The rest of the mounting options require removal of the dovetail base plate by unscrewing the two 3/8" long M6 crews with the aid of the included long Allen hex key. |
 |
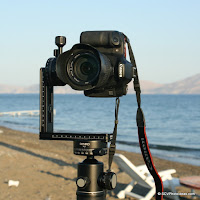
| For use as base of a Panorama head, the Panorama Clamp can be screwed directly on the tripod column as any other head via the 3/8"-16 hole in the bottom. Shown here on the Benro A-298EX Versatile Tripod. This solution would save some carrying weight, but the horizontal leveling should be performed by adjusting the tripod legs. If you are willing to shoot indoors where the floor of a room or a hall is flat and minor adjustment would be required then it might be a case. |
 |
| Another option is to attach the panorama clamp on a quick release plate with the aid of an 1/4"-20 thread conversion bushing... |
 |
| ... in order to fit on a non Arca-Swiss® compatible head QR plate. |
 |
| Like the Benro HD-38 3-Way head. More on this in my post Create a 5 way Precision Head. |
 |
| In order to attach the panorama clamp directly on a ball head, we need the supplied M6 bolt and the thick (and shorter) Allen hex key. |
 |
| With a little effort the first time, due to the "loctite" bonding the screw and thread, we can unscrew the Quick Release clamp from our ball head. (In this case the Benro B-2) |
 |
| Revealing the ball stem with the M6 threaded hole and the two anti twist islands on top. |
 |
| Which must be matched with the respective grooves on the bottom of the panorama clamp's stainless steel stem. |
 |
| Using the long M6 Bolt and the shorter 5mm Allen hex key both included in the panorama clamp box, we can mount and tighten the panorama clamp on top of the ball head. |
 |
| This mounting option saves us of some extra weight if panoramas is the main reason of using the head. |
Torque Test Results
Both PC-0 and PC-1 panorama clamps may be used as vertical rotators in various application including a Multi-Row panorama head as we shall see further down. All of these applications demand extra strength from the Panning Clamps in their capacity to hold offset loads. Be it at the end of a Nodal slide or by supporting a long and heavy telephoto lens.
Therefore, the clamps were tested in order to have an approximate assessment of the torque capacity.
Therefore, the clamps were tested in order to have an approximate assessment of the torque capacity.
 |
| In order to get an approximation of the mass required to move a fully pan-locked clamp from inertia, the Benro PC-0 was securely clamped on a workbench by its Arca dovetail plate screwed on its base. Next the panning base lock knob was tightened as much as possible by hand. |
 |
| My usual counter balance bag consisting of sand sacks totaling 5 kg, enclosed in a strong fabric bag was put into use. After some experimentation the ~ 5.5 kg weight of the bag + rail etc. reached a distance of 8.5 cm from the center of the quick release clamp, which denotes the pivoting axis of the leveling base, before the clamp begun to creep. This distance multiplied by the hanging weight means that the clamp can withstand a torque of ~46.75 kgF*cm or ~ 458 N*cm. By deduction this means a load of ~3.9 kg could hang offset with its center of gravity at a distance of 12 cm (4.7") from the pivot center (Gitzo method) or about 15 kg within the perimeter of the panning clamp. |
 |
| The same procedure was followed for the Benro PC-1 which was securely clamped on the workbench by its Arca dovetail plate on its base. Similarly, the panning base lock knob was tightened as much as possible by hand. |
 |
| To make the long story short, the same bag on the larger Benro PC-1, reached a distance of 14 cm from the center of the quick release clamp just before the clamp begun to creep as shown above. Once again the distance multiplied by the hanging weight calculates a torque of ~77 kgF*cm or ~755 N*cm. By deduction this means a load of ~6.4 kg could hang offset with its center of gravity at a distance of 12 cm (4.7") from the pivot center (Gitzo method) or about 25 kg within the perimeter of the panning clamp. Not bad at all considering that the difference in diameter between the two panning clamps is only 1 cm. |
Using PC-0 and PC-1 Panorama Clamps
These clamps can be utilized in many ways, some orthodox complying with the original purpose of their panoramic nature...
 |
| Benro PC-1 Used in Create and Use a Single Row Panorama head |
 |
| Benro PC-0 and PC-1 used as vertical and horizontal panoramic rotators in Create a Multi Row Panorama head |
 |
| Benro PC-0 and PC-1 used as vertical and horizontal panoramic rotators in the updated Create a Multi Row Panorama Head Ver. II |
 |
| Benro PC-0 and PC-1 used as vertical and horizontal panoramic rotators in Assemble a Compact Benro Multi Row Panorama Head |
 |
| Benro PC-1 used on Benro HD-38 in Create an Economy 5 way Precision Head |
 |
| Benro PC-1 used with Benro B2 ball head on a Benro A-298EX Versatile tripod in Create an Alternative Economy Gimbal head. |
Conclusion
Although Benro's panorama clamps are copies of well known brands the implementation is far above average and the cost for two clamps complete with Arca-Swiss® compatible dovetail base plates is less than the price for one of the competition without the base plate. !!!
The price difference between PC-0 and PC-1 Panorama clamps is very small. Someone has to decide between the two based on size and weigh mostly. The PC-1 is more convenient but also larger and heavier.
The motion of both clamps is really smooth with fluid feeling and the locking mechanism is gradual until complete fix. The clamp grip is strong and needs one turn of the screw knob to open or close.
 Update: October 2011
Alignment Error on early Benro PC-0 and PC-1 Panorama Clamps
 Update: October 2012
Assemble a compact Benro Multi Row Panorama head
I hope you found the article useful, thank you for viewing.
All Photos: © 2010-2015 S.C.Vlachos
Price & Availability:
Current price for the the Benro PC-0 and the PC-1 Panorama clamps is around US$ 85.00 and US$ 95.00 respectively shipping included from eBay
Update Sep 2015
Referenced Articles:
Benro B-2 Ball Head Review
Benro HD-38 3-Way Head Review
Benro A-298EX Versatile Tripod
Create and Use a Single Row Panorama head
Create a Multi Row Panorama head
Create a Multi Row Panorama Head Ver. II
Create a 5 way Precision Head,
Create an Alternative Economy Gimbal head
hello,
ReplyDeleteas you have both the Benro PC-0 Panorama clamp and the giottos MH 680 L plate.
can you tell me if the giottos L Plate fits into the Benro PC-0 Panorama clamp?
i know they are both arca swiss compatible but sometimes that does not mean much because of tolerances.
thax a lot!!!
bye
marius
Hello Marius,
ReplyDeleteThere is no problem whatsoever fitting the Giottos VL plate into the Benro clams or any other clamp that has a screw locking mechanism.
Actually the Giottos dovetail width is 39 mm (1.535") while the Arca standard is 38 mm (1.496") but this difference would rise a problem only with clamps equipped with a lever release.
Another point you should know is that Giottos plates have a drift lock mechanism at the ends only applicable with Giottos head clamps.
Therefore caution must be taken in order to avoid leaving the clamp loose.
While Arca standard plates usually have M3 screws at the ends as a drift stop mechanism.
Hope to have covered your question.
You'r welcome.
Regards,
Sotiris
thanks a lot for your answer!
ReplyDeleteregards
marius
Great review! Do you happen to know if the PC-0 will fit a B0 head by replacing the existing clamp on the head?
ReplyDeleteMany thanks,
B
Thank you for your comment!
DeleteTheoretically it can fit on the B-0 head, but it is a small ball head and in case you are going to use a nodal rail for panoramas, you have to check if B-0 is able to hold the extra torque, since your camera will hang offset from the ball center. (Torque = mass x distance)
You'r welcome.
Sotiris
Hi Marius. What do you think about Benro PC-0 and PC-1 with Benro system like this?
ReplyDeletehttp://dynaphos.com/product.php?c=14&sc=146&id=1484
It is exact copy of RRS system.
Hello Gianluca,
DeleteSorry my name is Sotiris. :)
Benro MPB150T and MPB180T L brackets seem a nice solution, as they are dedicated for PC-0 and PC-1 panorama clamps.
But I cannot express an opinion about their sturdiness and behavior to vibration under load, as I have not tested them yet.
I'm planning to test and review a Benro L bracket and Benro nodal rail combination soon, so please stay connected.
When? I'm going to buy it
DeleteI 'm preparing quite a few reviews at this time so maybe in 1-2 weeks.
DeleteProbably I decided to buy Nondal Ninja 5...
ReplyDeleteIn my humble opinion NN5 is not so sturdy for heavier camera/lens combinations, maybe it is good for entry level DSLRs. Further it is not Arca compatible so you can't use the components separately and last it is a discontinued model.
DeleteHave you checked my panorama head solutions?
http://www.scvphotoideas.com/2010/11/create-multi-row-panorama-head.html
http://www.scvphotoideas.com/2011/11/create-multi-row-panorama-head-ver-ii.html
Right! Here I am now - with a completely stuck screw that simply will not budge. Any advice? Bought the PC1 and B2 from D. Chang, all on your advice. Now all items are here, but as said: the #%¤& screw simply won't loosen from the clamp... Hope you have a good suggestion!
ReplyDeleteKind regards Jan.
Ps. very nice and cosy little corner you have. Highly enjoyable.
Hi Jan,
DeleteThanks for the nice comment, it's a fulfilling feedback that you enjoy reading my articles.
Now to the point, the term "#%^&" is not very clear to which screw you are referring to :)
However, I can only assume that you want to unscrew the QR clamp from the ball head and replace it with the PC-1. Right?
The M6 screw that fixes the QR clamp on the ball, is the only screw that should be "stuck", due to the loctite-like compound that keeps it from accidental unscrewing, (which I do mention in the review above).
If this is your case, you may follow the steps bellow:
a. Tighten both friction and lock knobs, so the ball does not move at all.
b. Heat up the ball stem (under the QR clamp) with a heat gun, strong hair dryer or as an ultimate solution a gas lighter (you should not let the flame contact the ball head though).
c. Insert the appropriate Allen hex key and while exercising pressure keeping it inside the screw hole, give it an abrupt counter clockwise push.
That should break the "loctite" film and let you unscrew the QR clamp easily afterwards.
Hope that I guessed right and helped.
Kind regards, Sotiris
Yes, it's THAT #¤#% screw! :P
DeleteI've contacted our friend from D.C. stuff - I find it most unhealthy to use this much force. The hexagonal key included in the package got deformed in use, but even a first grade HQ hex key can't get the screw loose...
A single drop of Loctite would have done the trick, but I'm afraid Benro has soaked the screw.
Thanks for your suggestion though. Heat sounds right and depending of what mr. Chang suggests, I'll keep it in mind.
Kind regards, Jan.
Ps. I'll keep you updated.
I had the same difficulty in the beginning too, but after I run the Torque test on the B2, the excessive load on the clamp probably made the trick for me.
DeleteYou're welcome, lets see what Mr. Chang has to say, but heat for sure will break the bond, just take care not to damage the paint.
Kind regards, Sotiris.
I hereby declare, that with my sample of the B2, it is not possible at all to remove the screw. Not even with heat!
ReplyDeleteFurthermore this little adventure has left a scratch in the ball itself. Sigh.
Mr. Chang replied with a not useful "You need an electric screwdriver or use clamp on clamp", but when I look at the DC Stuff page of the PC-1, it clearly shows under "Demonstration 2" how to remove clamp with the hex key and replace it with PC-1 head.
http://cgi.ebay.com/ws/eBayISAPI.dll?ViewItem&item=140736642929
I've now today offered DC Stuff to pay for both shipment and a repair replacement of the ball - but without a clamp mounted this time!
I haven't heard his response yet, but I hope DC Stuff can arrange this, as I really like this combo. Both items are as good, as you have described them in your tests, excellent.
This however should also serve as a warning for everyone, that you *may* get a clamp that is un-removable!
Benro should look into this. As said before, there's no need for more than a single drop of Loctite to keep the screw from getting loose. If any at all? I've been playing with the lovely pano clamp PC-1 on my other ball head and have no problem keeping it locked there, only by tightening the screw.
I'll keep you updated, but if you want to keep your blog clean, feel free to remove these posts! :)
Kind regards, Jan.
Hi Jan,
DeleteI'm sorry for your adventure and the scratch, I know how it feels with new gear :(
You are right that the screw should be removed with the hex key supplied as advertised, as I mentioned above I also had difficulty removing the screw but I did it with the hex key.
Somehow, it seems that not all screws obey the same, some are more stubborn than others.
Mr. Chang's suggestion for a power screwdriver with a hex tip, has ample ground as the force you will use to press the screwdriver vertically in the screw hole will add to the rotational torque exercised by the screwdriver.
There are also long handles for hex keys, I don't know if you have or can easily find one. As there are also angled wrenches with interchangeable hex tips. The long handle will give extra torque and is proper for inobedient screws.
Before getting into the trouble of sending it back, let me suggest also the ultimate solution of a small hammer. First, tighten the ball very well, set the ball head on its base on a bench, insert the hex key supplied in the screw head and give a small knock with the hammer vertically on the hex key in order to break the "loctite" bond. Then set the ball head on its side so as the clamp's flat side sits parallel on the bench and while keeping the hex key in the screw head give an abrupt knock on the hex key's long side.
(Needless to say, to take care with the hammer :) )
If this also does not work, what can I say...
Thanks for the updates, feel free to share your good or bad experience with the products. When one keeps relevant to the topic in a polite manner, is always contributing to the formation of a better opinion by the other readers, which is actually the purpose of this blog. :)
Kind regards, Sotiris.
I'm pleased to say, that D.C. Stuff has send me a very kind offer to replace the ball head! Furthermore they will contact Benro with the matter to ensure, that future ball heads should not suffer from this extreme Loctite use.
DeleteIn the meantime playing with the B2, I've found it's actually looking a bit too "small" combined with the pano clamp PC-1 and placed under my Nikon D300s... so I've ordered the Benro B3 model instead. D.C. Stuff has promised the clamp will be delivered seperated from the ball this time! :)
This B3 ball head also should look better on the Benro C3770T tripod I've planned for purchase in a month or two. Btw. where's the review of this tripod on your site? hehe
All in all this has been a good experience - though "wrecking" the ball head, a couple of pics of the horror here http://s189.photobucket.com/albums/z15/subject_rod/Benro/ - but the best part was finding your site, Sotiris! It literally has saved my sanity, as you showed me an alternative way to put together a nodal kit. Even with an extra ball head I've still saved $500 compared to "the other extremely expensive solution" and this Benro gear is really, really nice.
Next week the slide/clamp should arrive from Hejnar Photo, another alternative I wouldn't have found without your site.
So thank you, Sotiris and have a nice weekend!
Kind regards, Jan.
I'm also pleased to read that your small adventure will have a happy ending.
DeleteBenro B3 weighs a little more but considering the small price difference charged by DC stuffs, for sure it is a better match sizewise, both to the PC-1 clamp and the C3770T tripod. The extra ball diameter will offer you greater stability, especially with offset loads like in a panoramic setup.
Benro C3770T is a tripod I'd like to test & review, but for the moment it stays in the "Wish list" section together with some other stuff. hehe
I can't afford buying all gear I would like to review, so after you get it, maybe you can write a review for the site as a guest reviewer.
Well, I'll keep the link and in case my ballheads disobey and function inappropriately, I'll show them the horror pics to scare them off. :)
Thank you very much for your kind comments, really appreciated.
You are welcome and have a nice weekend too.
Best regards, Sotiris.
Today the B3 arrived and I was very relieved to see, that the clamp was detached from the ball on delivery. Just as our friend Mr. Chan had promised! So, if you want to be sure to be able to remove clamp, just drop Mr. Chan a note upon ordering, and voila! No thrills or pains.
DeleteThe B2 ballhead had no problems at all with stability, but I must say, that speaking from a purely visually view, the PC-1 pan clamp and B3 ball looks very pleasing! :)
Kit now consist of Benro B3, PC-1, Hejnar E033 w/mini clamp (black knob!) and it's an absolutely pleasure to work with. Smooth, beautiful and rock solid. Highly recommended!
Last step will be the Benro tripod, and I'll send you a report, once it's in the house.
Thanks for the inspiration and suggestions! Owe you $500... :P
Kind regards, Jan K.
It's a pleasure to know that you are finally happy with your panoramic kit, sometimes just using new gear is enough inspiration to go out for shooting. Enjoy!
DeleteWhen you get the tripod, it would be nice to know your impressions, you may contact me at (svlachos@scvphotoideas.com)
Thanks for the $500 :P I promise to spend it in "good will" for more reviews. ;)
Best Regards, Sotiris
Thank you for your technical informative & creative review.
ReplyDeleteCan you do a review on sirui M3004/M3204 tripods?
wish to happen good things
pktk
Thank you too for your kind comments and wishes.
DeleteIf Sirui would offer a tripod for evaluation/review, I would be glad to do it in depth, as they are well designed equipment.
Otherwise, it is unfortunately out of budget at the moment to buy one for review.
All the best,
Sotiris